Pages & Popups
Pages
The Pages are a major part of your Website.
The Pages section allows you to reorder, manage and create new pages in your Website. Organize your Website’s widgets by using multiple pages to improve your visitors’ experience and increases the chance that they will find the information they need.
Adding Pages
- Click Pages in the left menu.
- Click New Page.
- Select a page type. Page templates are pre-populated with relevant widgets. The Blank Page type is going to be used most often. This will allow you to pull different widgets onto the page and structure it as you wish.
The
Page URL page type links the page to another URL instead of creating a new page.
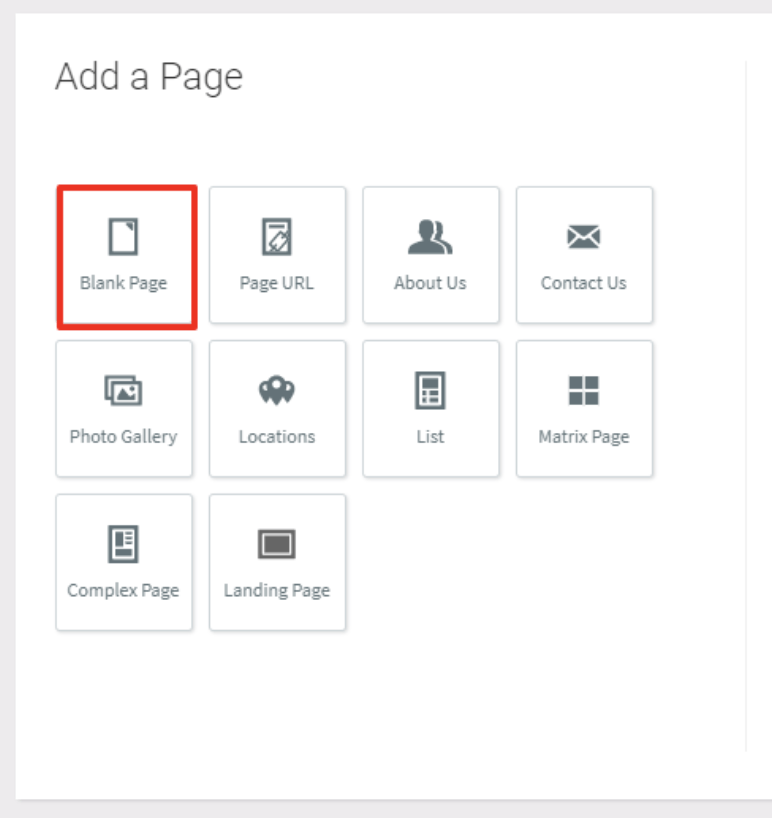
- Once you’ve selected a page type, enter a title for your new page, and an URL if necessary.
- Click the Add Page button and start creating your new page.
If you want to learn how to create a page that is not clickable, which helps organize sub-pages, visit our Navigation Folder
page.
Reorganizing Pages
In the Pages menu, click and drag a page to move it where you want it to go. Dragging a page slightly to the right nests the page as a subpage of the page above.
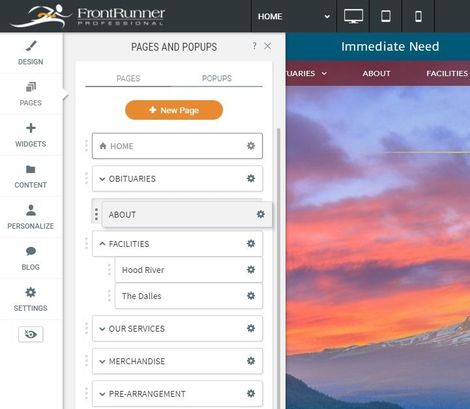
Page Settings
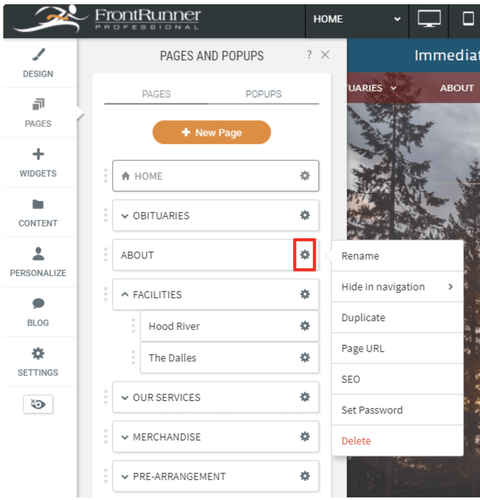
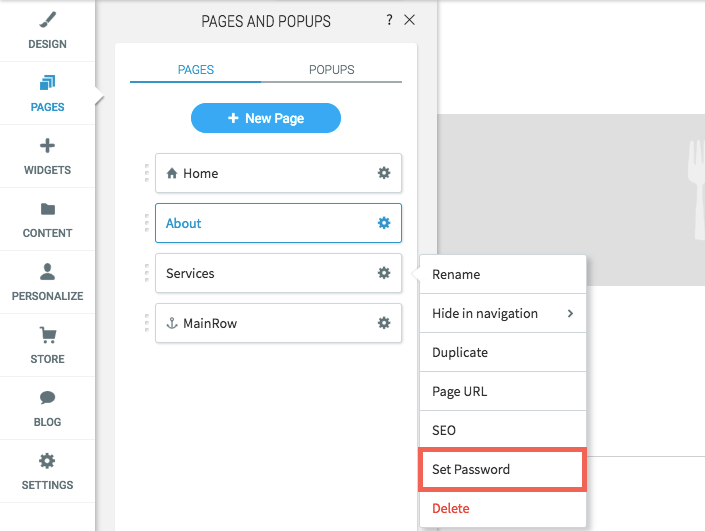
Access the page settings by clicking the gear icon next to each page.
Page Setting Options
- Rename – Rename the page in the Editor. Note: This does not change the page URL.
- Hide in navigation – Make the page hidden on the navigation menu. It will still be visitable by the direct URL.
- Duplicate – Creates an exact copy of the page.
- Page URL – Change the page’s URL or permalink.
- SEO – You can access all the SEO settings for this page here.
- Set password – Set a password for your Site (see steps below).
Password Protected Pages
With password protected pages, you can add a password to specific pages on your site that visitors will need to enter in order to view that page. Password protected pages are beneficial when certain information is designed for specific audiences; for example, to restrict access to a download page. Here is how to create password protected pages:
Navigate to Pages, located on the left menu, right-click over the gear icon for the page you want to set a password to, and click Set Password.
Set a password for the page. The password can be no more than 100 characters, but can contain any characters.
Click save. Your page is now protected by a password. You can remove this password at anytime by clicking Remove password.
- Password protected pages should not be confused with user logins or account management. Password protected pages only adds an individual password for one page, not different passwords for different users.
- Anchored pages cannot be password protected pages. In order to password protect a page, make sure that the page is not anchored to another page.
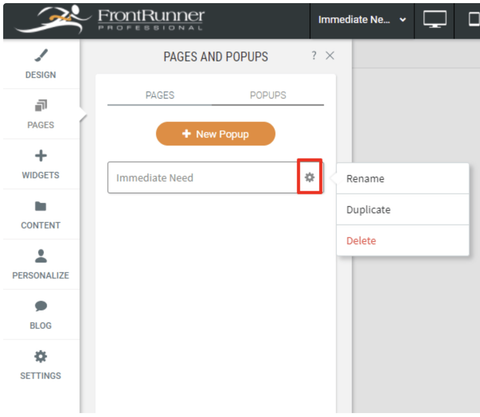
Popups
Adding Popups
Click Pages in the left menu and then click Popups tab along the top.
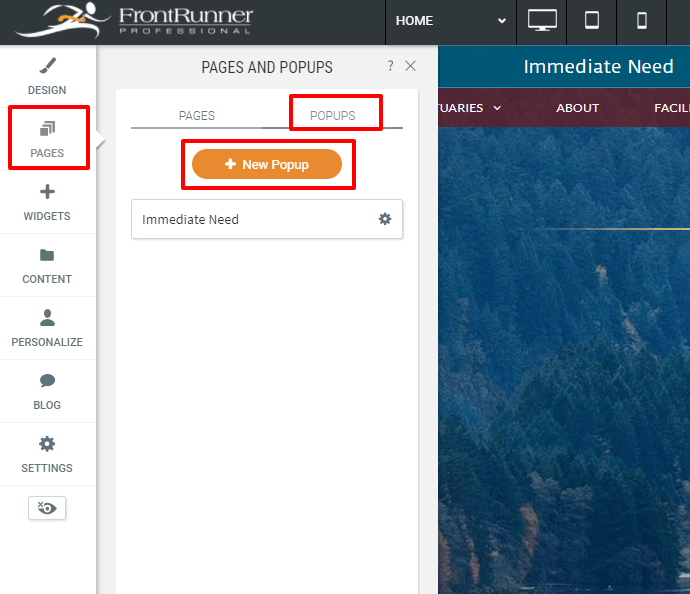
Click the New Popup button when ready to create a new Popup.
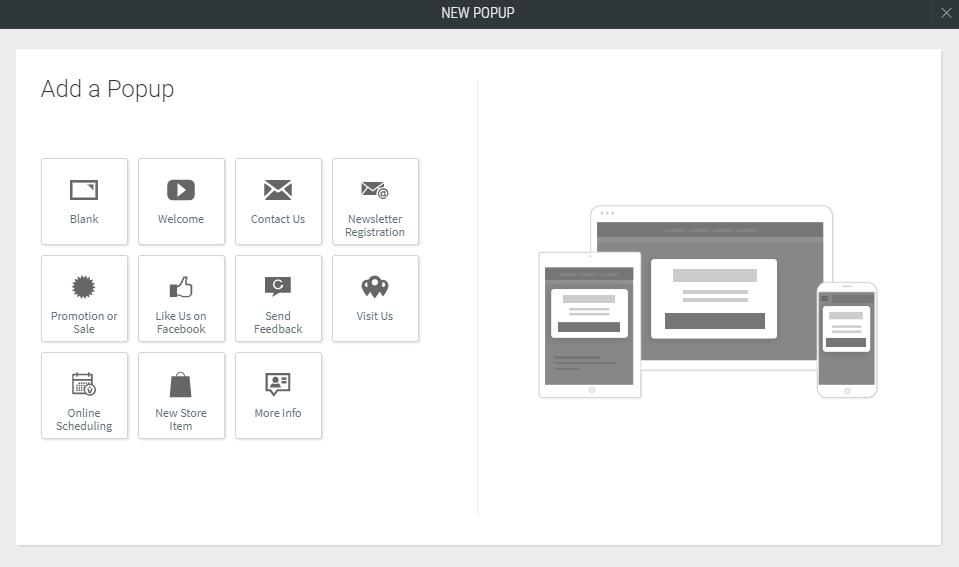
Once you have selected a Popup type, enter a name for your popup and then click Add Popup at the bottom.
How to Activate a Popup
Unlike a page generated in the navigation automatically, a popup can only be conditioned by being clicked as a link or by using a personalization rule.
Linking to a Popup
There are several widgets that allow you to link to a popup, such as Photo Gallery image links, text and buttons. When editing the links for these widgets, simply click the popup option to bring up the popup selector.
Using Personalization Rules to Condition a Popup
Popup conditions only occur ONCE per session.
You can also create a popup using website personalization. Create a personalization rule. In the “action” area, select the popup action.
Editing A Popup
A popup is very similar to a page. You can add new rows, columns and insert any widget into a popup.
You can adjust the size of the popup by dragging the corner handlebar.
Popup Settings
The popup menu comes with 3 basic settings.
- Rename – Rename the page in the Editor. Note: This does not change the page URL.
- Duplicate – Creates an exact copy of the popup.
- Delete – Deletes the popup. This action is irreversible unless you have a backup.