
Add a Contact Form
Use the Contact Form widget to add a complete web form to your website. The contact form allows you to provide visitors with a variety of input areas; specifically text, dropdown, radio buttons, checkboxes, date, time, email, and phone numbers. You can use the form for email newsletter opt-ins, customer questions, or simply to gather feedback from your site visitors.
Add the Contact Form widget onto your website. To learn more about adding widgets to your website, see Adding Widgets.
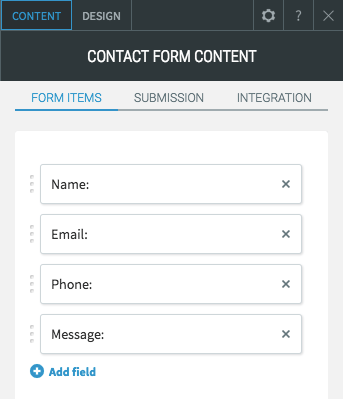
Once the widget has been placed, the Content Editor will appear.
Decide what information you'd like to get from your visitors and then modify the existing field by clicking the name of the field.
Add new fields by clicking the 'Add field' button.
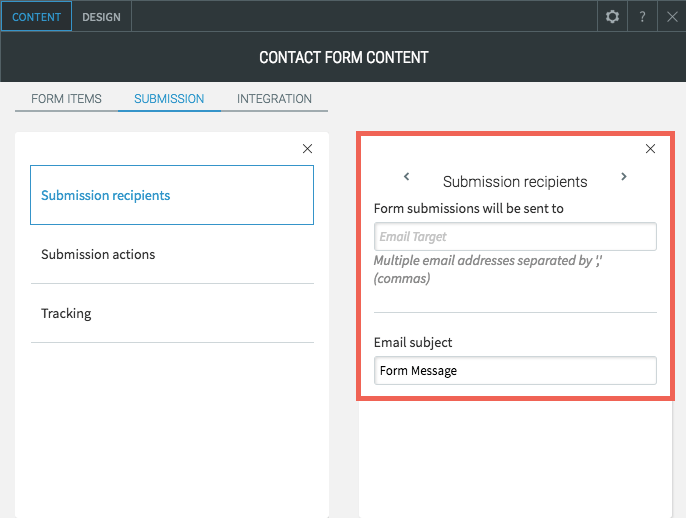
Click the Submission tab. In the Submission recipients section, set the email address and subject for receiving form responses.
In the Submission actions section, set the confirmation and error messages to display when visitors submit the form. Use the Rich Text Editor to add color, emphasis (bold, italics and underline), and bullets to text in the message boxes.

In the Tracking section, add a tracking code to your form. If you have AdWords or any other conversion code, you can paste this code here.
Setting up your GDPR-Friendly Contact Form
To obtain consent from your visitors upon contact form submission, simply add a new field to your contact form following the instructions above and pick either the Opt-in or Free text option.
Add Opt-in field
Adding the Opt-in field will add a checkbox confirming your visitor’s consent to share form responses. This field will be required to submit the form response.
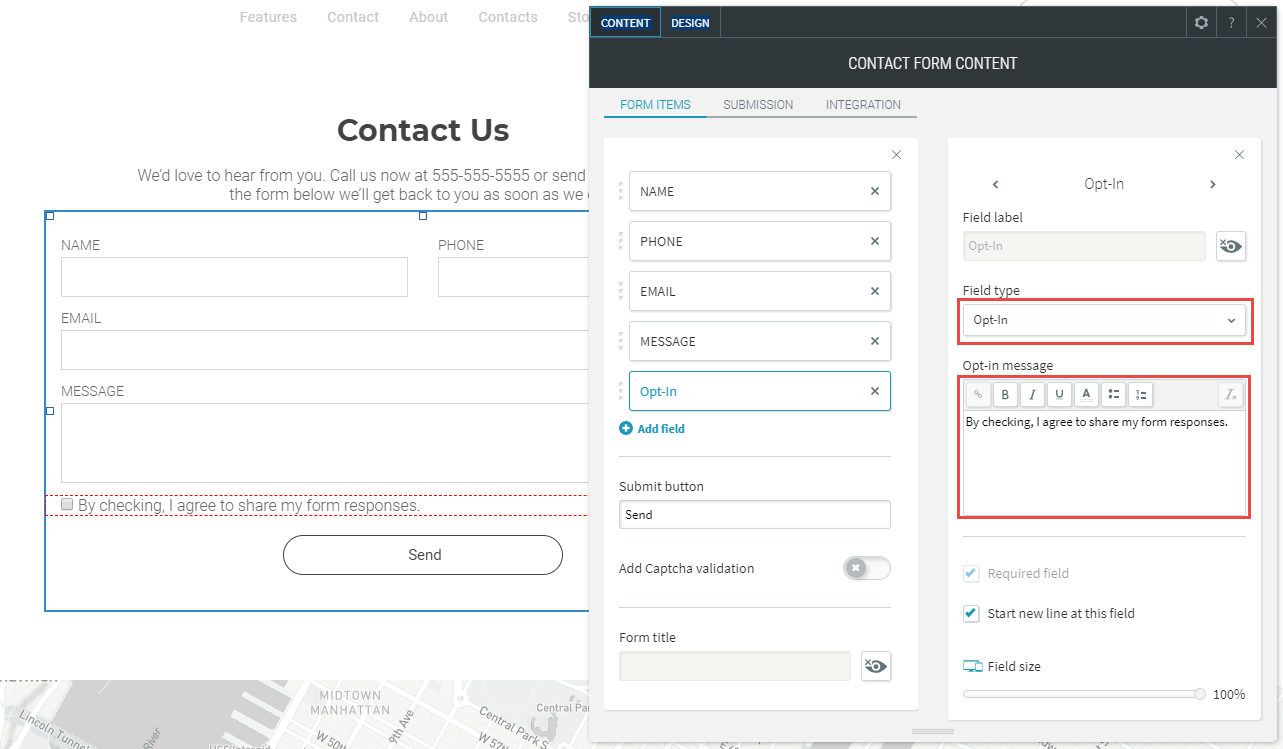
The default text is “By checking, I agree to share my form responses” but you can replace this with custom text if you like.
Add free text field
You may choose to add a different notification using free text. In this case, the field will simply appear as a notification below the fields of your contact form.
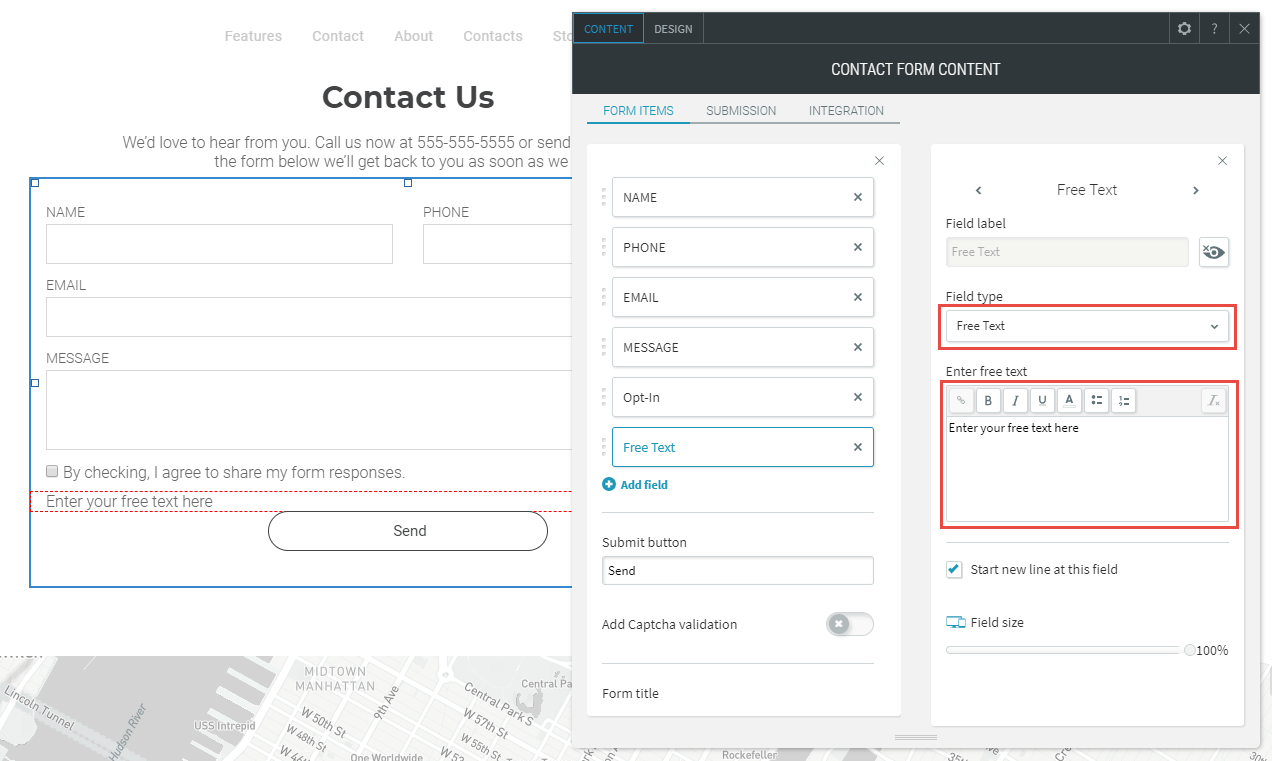
Please note: There is no default GDPR or privacy-related placeholder text in the free text field, as this is a multi-purpose field, so you need to place your custom text.
Delete form responses
To delete responses received via a contact form, please go to the site dashboard, click the hamburger icon next to the site where the form appeared and select Form Responses.
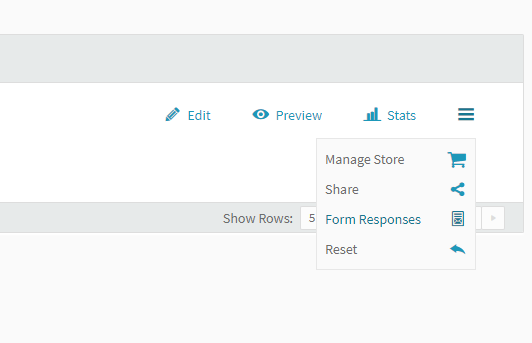
Alternatively, you can open the Manage Form Responses field in the Content tab of your left-side editor menu.
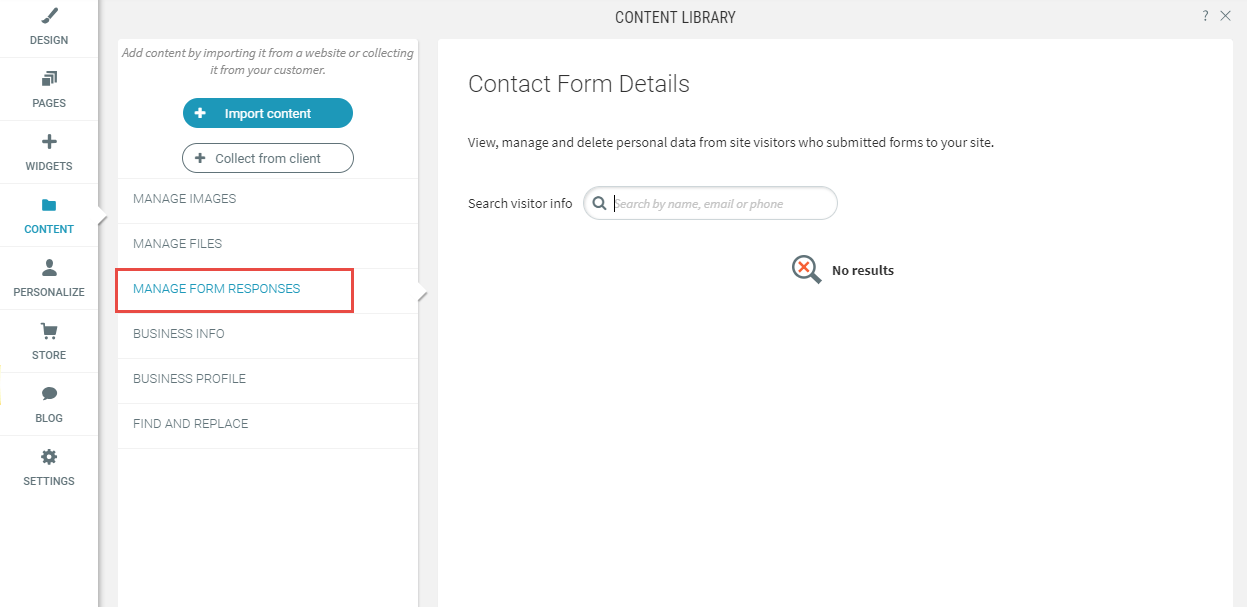
The Form Responses page that opens allows you to remove any response to any form on that site. You can search for relevant responses in the Search visitor info search box. Make sure you search for the exact name, phrase or characters.
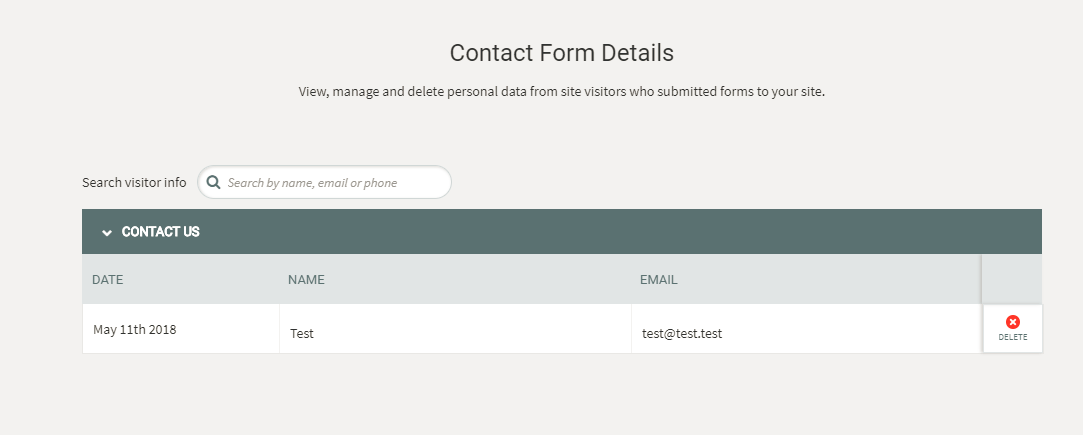
Clicking on the relevant form tab opens a table which includes:
- the date of the form response submission
- the input from each of the form fields
- the option to delete the form response
Integrations
You can extend the reach of your contact form, by integrating it with Google Sheets, Mailchimp, Constant Contact or a 3rd party application using Webhooks.
If you need help on editing the design of your widget, visit our Widget Design
page.